Divya
How to Install Joomla in Localhost
Install Joomla in local host is very easy. Please follow the below step to install Joomla in your localhost.
Requirements
Database − MySQL 5.1 +
Web Server −
- WAMP (Windows)
- LAMP (Linux)
- XAMP (Multi-platform)
- MAMP (Macintosh)
Operating System − Cross-platform
Browser Support − IE (Internet Explorer 8+), Firefox, Google chrome, Safari, Opera
PHP Compatibility − PHP 5.4+ or PHP 5.3.10+
Step to Install Joomla in Localhost
Step 1:
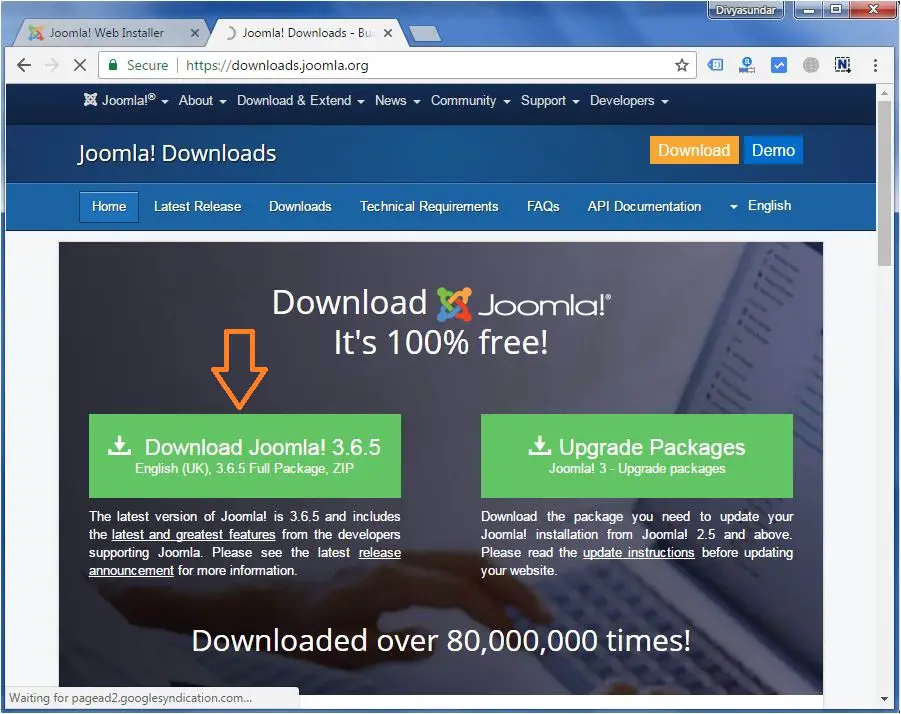
Open the link http://www.joomla.org/ in any browser of your system and download the Joomla by click on the download link that show in the below screen shot.
Step 2:
As Joomla requires MySQL database, create a new empty database with username and password in your PhpMyadmin by visit the link Localhost/phpmyadmin. The user name and password is user defined so give any username and password of your choice.
Step 3 :
Extract the downloaded Joomla file and upload it into your web server or localhost.Step 4 :
Open your web browser and navigate to your WordPress file path localhost/< Your_Joomla_folder >.
Example : localhost/joomla/ (wp is my wordpress folder name)
Then you find a page like this.
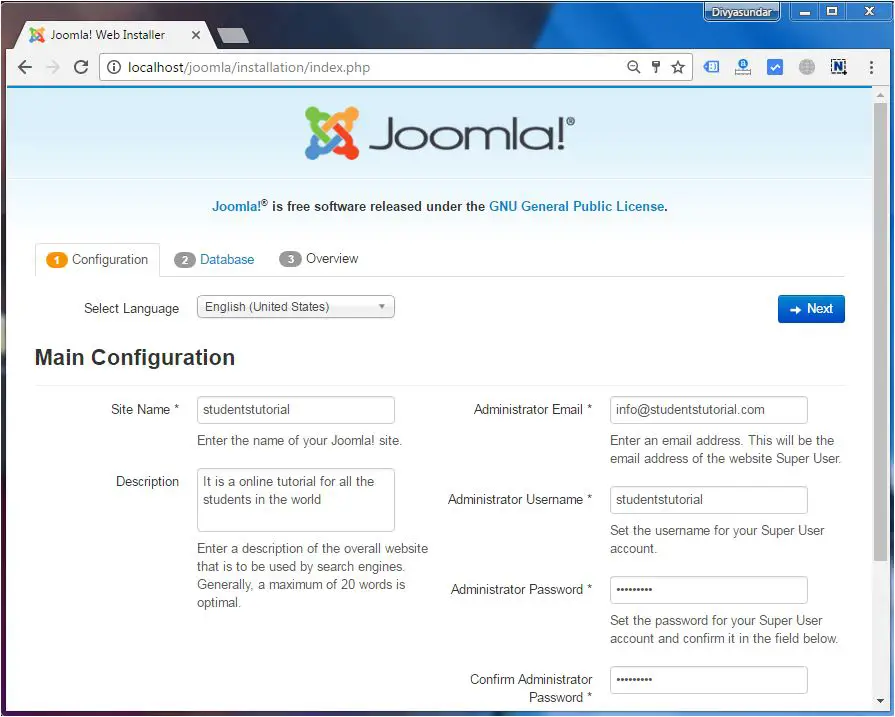
Fill all the data of main configuration field like site name, Administrator username, password etc. Then click on the next link. After click on the next link you find a page like this below screenshot.
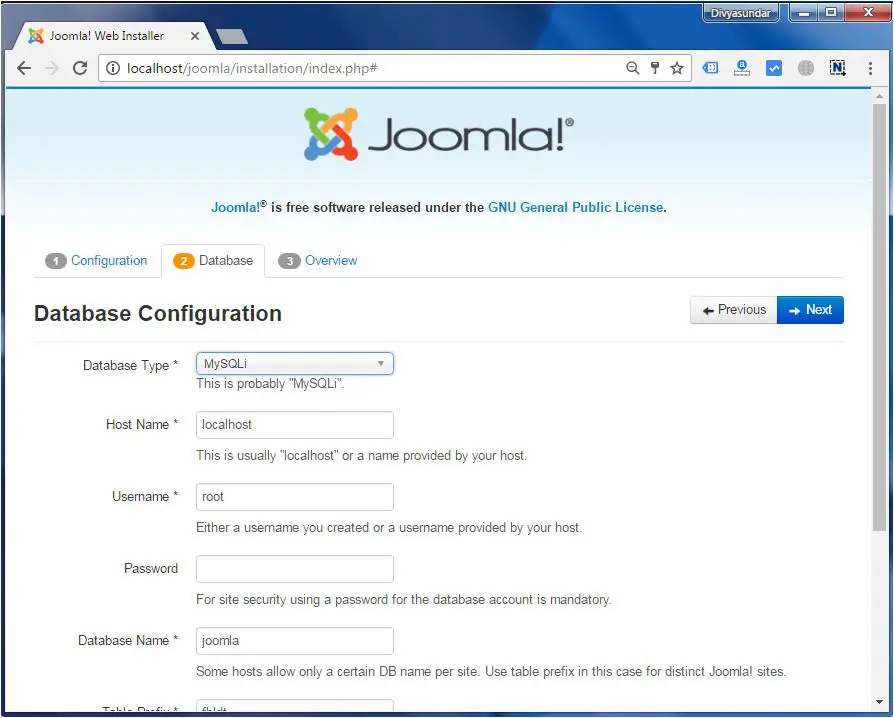
Step 5:
In this step, you can view the information needed for the database before proceeding with Joomla installation.
Here, you have to enter the information about the MySQL database like database name, username, password etc.
After filling all information, click on next button.
Step 6 :
Joomla checks the database setting as per given detail by you. If all the detail are match you get a overview page with the details that you enter in previous step.
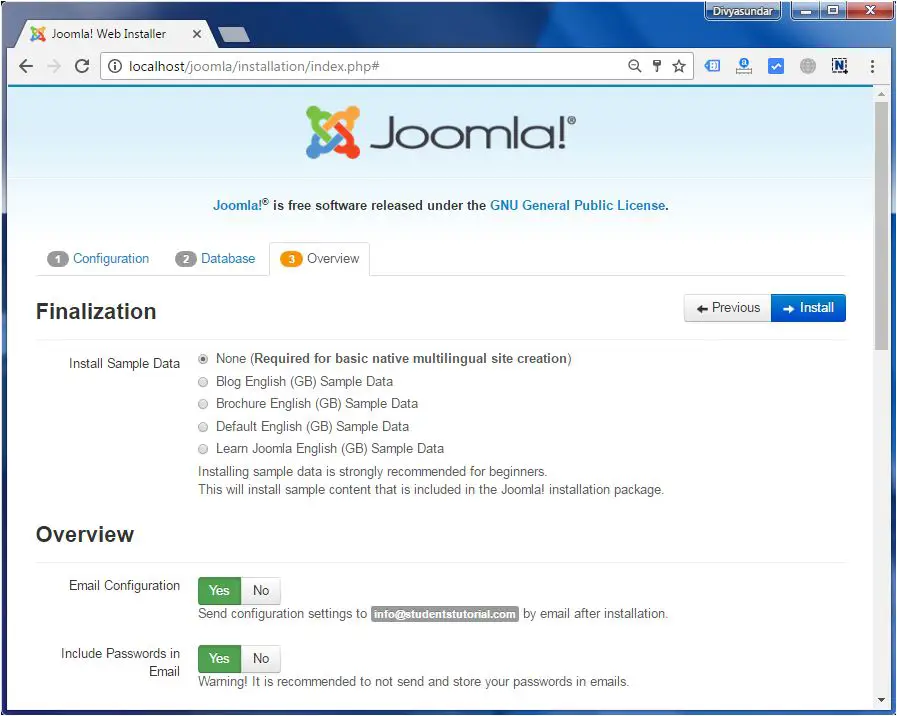
Then click on the install button to install Joomla.